Showing posts with label yummy. Show all posts

Saturday, August 3, 2013

Butterfinger Pie

I love me some Butterfinger bars, though I rarely have on, but come Halloween when my son tends to get far too many chocolate bars, I like to find interesting ways to use up that candy, because otherwise you experience what we are right now, where it's August and because every holiday seems to require kids getting candy, we still have Halloween candy... from last year.

Anyway, this last year, I decided to check out Pinterest and see if I could find a way to use up some candy bars and came across recipe for Butterfinger Pie and KNEW I had to try it. It was seriously as delicious, maybe more ;), as it sounds. So, naturally, I decided to share it with you all.

(Not originally my picture or recipe)

Butterfinger Pie

Ingredients:
6 (2 1/8 oz.) butterfinger bars, crushed
1 (8 oz.) pkg. cream cheese
1 (12 oz.) container cool whip
Graham cracker crust

Directions:
Mix first three ingredients together.

Pour into pie crust.

Chill.


Enjoy!

Check out the pin here!

Until next time,

Amanda

Sticky Bun Breakfast Ring

Mornings can be hectic, especially with kids. An average morning in my house is often some tornado-like blur where we rush around trying to get everything done and get out of the door in time. So, when you can get a morning that ISN'T rushed, it's a really nice treat. On those mornings, it's always nice to make a nice breakfast for the family, even if it's just cinnamon rolls, or like this Sticky Bun Breakfast Ring. So if your family is as busy as ours, or if you just want a different sort of breakfast recipe, or for a special treat, look no further!

(Not originally my picture or recipe)

Sticky Bun Breakfast Ring

Ingredients:
2 small tubes or 1 large tube of refrigerator buttermilk biscuits
3 Tbsp. butter, melted
½ cup pancake syrup
1/3 cup packed light brown sugar
½ tsp. cinnamon
¼ cup chopped pecans, optional
¼ cup chopped almonds, optional

Directions:
Spray a bundt pan with non-stick spray. Combine the melted butter and syrup in a small bowl and set aside. In another bowl, combine the brown sugar, cinnamon, and nuts (if desired). Place about half of the syrup mixture in the bottom of the pan. Then sprinkle half of the brown sugar mixture on top. Lay the biscuits on the bottom of the pan, overlapping edges (closely together) to form a ring. Top with remaining syrup and sugar mixtures.

Bake at 375F for approximately 20-25 minutes or until golden brown. Cool for 1 minute in the pan, then invert onto a serving platter and enjoy.


I hope you enjoy this recipe as much as we do!

For pin, click here!

Until next time,

Amanda

Thursday, May 23, 2013

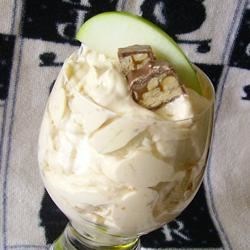
Snicker Salad

Well, now it's time again to share another recipe with you all! Today's recipe is PERFECT for all the family get-together's that will be starting to take place (Mother's Day, Father's Day, summer bbq's, reunions, etc.). I made this salad I think a year or two ago and it was a huge hit at a family meal, so naturally with summer just around the corner, I must share!

 
(Not my picture or recipe)

Snicker Salad

Ingredients:
8 oz. container cool whip
1 pkg. instant vanilla pudding
1 c. milk
5 green apples, diced
5 regular sized snickers, frozen (makes it easier to chop)

Directions:
Add instant pudding to a mixing bowl and pour in milk. Mix well and let chill while chopping candy and apples.

Chop snickers into bite-sized pieces.

Chop apples into bite-sized pieces.

Fold cool whip into pudding mix until well blended. Mix in snickers and apples.

*You can adjust the apples and snickers to your liking in how much you want in the salad.

Thank you for reading, hope your family enjoys it like we have!

Until next time,

For pin, click here!

Amanda

Monday, April 8, 2013

Valentine's Pretzel Buttons

I've seen these things done several times for Christmas and other get together's, so when I was looking for a cute and simple idea for Valentine's Day, this was perfect and so cute!

These pretzel buttons are so easy and nearly impossible to screw up. They're also incredibly yummy and make the perfect snack for this day or to give away with Valentine's!

(Not my image or recipe. Click title for original.)


Ingredients:
A bag of small square pretzels
Bag of Hershey’s Hugs (striped ones)
Valentine’s M&M’s (red and pink)

Directions:
Preheat oven to 200F. Line a cookie sheet with parchment paper.

Place the pretzels on the cookie sheet and top them with hugs.

Bake for 4-5 minutes until the chocolate is shiny and soft, but NOT melting – they should still hold their shape.

Carefully place on M&M in the center of each hug and press it down to spread the chocolate.

Allow to cool completely and enjoy!


Told you it's quick and simple! Hope you enjoy it like we did!

For pin, click here!

Until next time,

Amanda

Pumpkin Pie Smoothies

I love me a smoothie and so does my son. One of my favorite things to do when I was a stay-at-home mom was make us a smoothie every morning. It was little ritual we'd have while we sat and watched some cartoons together. Now that I'm not at home, we're kind of limited for this kind of stuff to weekends and lately we haven't had the time, but it's always a great thing to do when we can fit it in.

I was unsure about this recipe when I made it because it sounded good but in smoothie form, a Pumpkin Pie seemed weird for breakfast. I also wasn't sure the kiddo would like it. I was pleasantly surprised to find it both delicious AND that my son loved it! So here I am, sharing it with you wonderful people!

(Not my original image or recipe)

Pumpkin Pie Smoothie

Ingredients:
½ banana, peeled, frozen, and diced
1/3 cup pumpkin puree
1/3 cup Greek yogurt
¾-1 cup soy milk
Pumpkin spice
Cinnamon
Pinch of Ground Cloves
1 tsp. vanilla
4-5 ice cubes

Directions:
Blend all until smooth and sprinkle with cinnamon, pumpkin spice and cloves.


And there you have it! A quick and easy breakfast or snack idea!

For pin, click here!

Until next time,

Amanda.

Monday, February 18, 2013

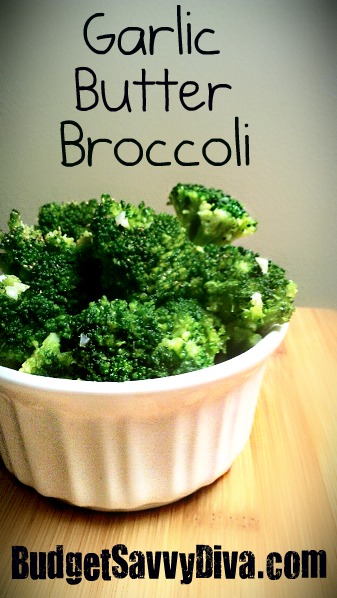
Garlic & Butter Broccoli

When I made this, I originally served this with the Poppy Seed Chicken I made one night, but this could really go with so many things. If you're looking for a good, healthy, AND Gluten-Free side-dish, or really could be a lunch time meal if you so wish it to be, look no further than here! It's also great if you're a broccoli lover like myself!

(Not my picture or recipe. Click title for original.)


Ingredients:
20 oz (2 1/2 c.) Broccoli (can be fresh or frozen)
2 Tbsp. butter or margarine
1 clove garlic, minced
Salt and pepper

Directions:
Cook broccoli in salted boiling water until tender (about 5 minutes) and drain.

In a pan, melt butter. Add garlic and cook for about 2 minutes. Add broccoli and toss.

Garnish with pepper. Enjoy!


See? Quick, easy, and practically fool proof! I hope you all enjoy it as much as we did!

For pin, click here!

Until next time,

Amanda


Poppy Seed Chicken

In our house there's a tad bit of a divide on meat preferance, though we're all accomodating of each other. My husband loves beef, I love chicken, and our son, well, we're lucky if we can get him to eat it, though pork and chicken are usually what he'll try - beef is a no go. So, I try to keep it relatively even for what kind of meats I cook with and with meatless meals so we can all win when I do my meal planning. But I have to say, when you take a look at my Pinterest, you'll find that I have SEVERAL more chicken meals and dishes than I do of any other kind.

When I came upon this recipe it had to be tried. Now, when I meal plan from pinterest, I like to go to the very bottom of the board so that I make sure I'm not just repinning the same things or that I'm actually not just trying the new stuff. I was SO happy when I finally reached the point of being able to try this recipe and boy was it a good one! I didn't eat much because I wasn't all that hungry, but between my son and husband, there was no leftovers to be had and they both said it was definitely something to make again.

(Not my picture or recipe. Click title for original.)


Ingredients:
3 skinless, boneless chicken breasts
1 chicken bouillon cube
1 (10 3/4 oz) can condensed cream of chicken soup
1 (8 oz.) container light sour cream
2 tsp. poppy seeds
salt and pepper, to taste
1 sleeve (approximately 31) Ritz crackers
1/4 c. butter (approximately 4 Tbsp.)

Directions:
Preheat oven to 350 degrees F.

In a large pot, bring water and bouillon cube to a boil. Add chicken breasts and cook until no longer pink. Remove breasts and place on a plate to cool.

In a large mixing bowl, add chicken soup, sour cream, poppy seeds, and season with salt and pepper. When chicken is cool, shred or cut into bite-sized cubes and mix in with soup mix.

In a smaller bowl, crush crackers and add butter. Microwave for 20 seconds or until butter melts. Stir to coat the crackers.

Coat an 8x8-inch baking dish with cooking spray. Add chicken mixture and spread evenly. Top with cracker topping and bake for 30 minutes. Remove, allow to cool and set for 5-10 minutes.

Enjoy!


I'm sure if you try this with your family it'll be a hit!

For pin, click here!

Until next time,

Amanda


Sunday, February 17, 2013

Strawberry Cheesecake Salad

I made this as a side dish one night thinking that it would likely go over well. It's since become one of my favorite salads to make and serve. It's so creamy and delicious and just as easy to make! If you're looking for a quick, easy, new salad to take to a family get-together, picnic, or potluck - look no further!

(Not my picture or recipe. Click title for original.)


Ingredients:
12 oz. cool whip
1 small pkg. cheesecake pudding (powder)
3 6oz. strawberry yogurts
1 lb. fresh strawberries, sliced
3 bananas, sliced (add just before serving or they'll brown)
miniature marshmallows (add just before serving)

Directions:
Thaw cool whip and in a large bowl stir it together with yogurts and pudding powder. Let this set up in the fridge for at least an hour before serving. Wash and slice strawberries and add into mix. Add bananas and marshmallows just before serving. Keep refrigerated.


Use this and I'm sure it'll be a big hit!

For pin, click here!

Until next time,

Amanda

Bacon Pear Grilled Cheese Sandwiches

My husband and I both love grilled cheese sandwiches. On nights when neither of us really feel like making much of an effort we'll make them because they always go over well. While looking through one of my favorite food blogs, I came across this recipe and wanted to try it. At first my husband was skeptical because it involved fruit and he's just one of those guys that thinks things like this shouldn't go together, man did I prove him wrong ;).

(Not my picture or recipe. Click title for original.)


Ingredients:
8 slices of bread
Bacon, cooked until crisp
1-2 Bartlett Pears, sliced
Sharp White cheddar cheese, sliced (I actually used Mozzarella because I couldn't find white cheddar)
butter, softened and spreadable

Directions:
Heat either a cast iron skillet, griddle, or panini grill to med-high heat. Layer the sandwich: bread slice, cheese, pear, bacon, more cheese (if you wish), and another bread slice. Butter the to slice of bread and place on the pan, buttered side down. Then butter the remaining side.

If you are not using a panini press, you can use a spatula or heavy pan to press down on the sandwich during grilling to get a similar result. The sandwich is done when the sides are toasted and the cheese is melted.

Enjoy!


Here's hoping you like it as much as we did. Even my skeptical husband loved it! :)

Until next time,

For pin, click here!

Amanda

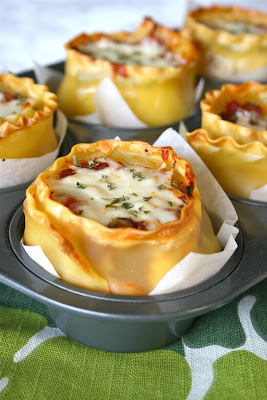
Lasagna Cups

My husbands favorite food on this planet is Lasagna. I'm fairly certain that if I allowed it he'd probably eat it morning, noon, and night day in and day out. I'm not kidding when I say I've gone to visit family for a week or weekend and before I leave I'll make up up a pan of lasanga and he'll spend the next few days eating it. This man LOVES his lasagna. So when I found this recipe on Pinterest I knew it'd be a hit.

While I was planning out meals for the next while a couple weeks ago I decided I would try this out for Valentine's Day as a special treat to the hubby. Man was he glad to see me making lasagna, even if in a different form. He's even asked me to make it again for his birthday next week! We'll have to see about that one... ;)

So without further adieu, I bring you...

 
(Not my picture or my recipe. Click on title for original.)


Ingredients:
Sauce:
2 Tbsp. olive oil
1/2 large onion
1/2 lb. lean ground beef, cooked and drained
1/2 red bell pepper, chopped
1 small zucchini, diced
2 cloves garlic, minced
1 6 oz. can tomato paste
1 8 oz. can tomato sauce (+ 1/2 can water to wash out can)
1 14.5 oz. can diced tomatoes
1 Tbsp. dried basil
1/2 Tbsp. dried oregano
1 bay leaf
1 tsp. sugar
Salt and pepper to taste

Cheese Filling:
1 10 oz. tub Philidelphia Italian Herb & Cheese cooking cream
1/3 c. grated parmesan cheese
3/4 lb. mozzarella cheese, grated and divided
1/3 c. ricotta cheese
1/2 tsp. pepper
1 egg

21 Lasagna pasta sheets

Directions:
Sauce: Heat oil over medium heat and saute onion, pepper, zucchini, and garlic until tender, about 5 minutes. Stir in cooked ground beef and tomato paste until well incorporated. Stir in remaining ingredients and bring to simmer. Reduce heat to low and cook for 30 minutes or so. (The longer it cooks, the better it will taste!) This will be very thick.

Cheese Filling: Stir all ingredients together excluding half of the grated mozzarella cheese, set aside.

Pasta: Bring large pot of salted water to boil. Cook pasta sheets 2 minutes less than package directions and drain. Place pasta on greased baking sheet until you are read for assembly.

Assembly: Preheat oven to 350 degrees F. Line 12 jumbo muffin tins (I just did 18 regular) with squares of parchment paper. If they don't stay in on their own, that's okay - the pasta will help wihtthat. Line the edges of the muffin tins with 1 pasta sheet per cup (sheet will overlap about 2 inches). Spoon about 1/2 Tbsp. of sauce into the bottom of each cup. Next cut 9 pasta sheets into quarters and press one of these pieces of pasta into the bottom on top of the sauce. Top pasta sheet with a generous tablespoon of sauce and then a generous tablespoon of cheese filling. Repeat this pasta-sauce-cheese layerong one more time being sure to press out any air bubbles. Top these lasagna cups off with a third piece of pasta, more sauce, and the remaining mozzarella cheese. Bake for 25-30 minutes or until everything is hot and bubbly. Serve hot.


If you love lasagna, I'm sure you'll love this as much as us!

For the pin, click here!

Until next time,

Amanda

Monday, February 4, 2013

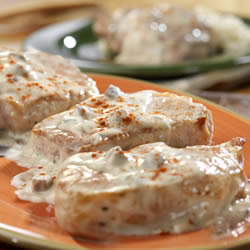
Creamy Ranch Pork Chops and Rice

One of my favorite things to make is pork chops in a mushroom gravy. We hadn't had it in awhile so when I made my grocery list for the week, I decided to try out this recipe and see if maybe I'd have a new favorite on my hands. Turns out, it was a huge hit. The three of us loved it! My husband is a huge Ranch fan so I knew he'd be game. My son, who is normally very picky with meat even gave it a try, though I'm sure he liked the sauce over his rice more than anything.

So, without further adieu, I bring you tonight's latest addition in the recipe book!

(Not my picture or recipe. Click title for original.)


Ingredients:
1 Tbsp. vegetable oil
4 boneless pork chops, 3/4-inch thick
1 (10.75 oz) can Cream of Mushroom Soup
1/2 (10.75 oz) can milk
1 (1 oz) pkg. ranch salad dressing mix
Paprika
Ranch-style rice (I just used regular white rice)

Directions:
Heat oil in skillet. Add chops and cook until browned.

Add soup, milk, and 1/2 package salad dressing mix. Heat to a boil. Cover and cook over low heat 10 minutes or until done. Sprinkle with paprika.

Serve with rice.


Such a simple and quick meal, which you all already know is my favorite kind! ;)

Until next time,

To view the pin, click here!

Amanda

Sunday, February 3, 2013

Pizza Casserole

We're super busy around my house. I know we're not alone. Monday-Friday (and some Saturday's) my husband and I work. From there it's trying to keep things up around the house, pay bills, be parents to our son and fur-babies, alongside projects for our new house and various other small side things going on. We're always doing something or going somewhere so quick, easy, and filling meals are a must in our day-to-day life. If they bring on leftovers? Even better! It means we have lunches and that I may not have to cook supper the next night!

I came across this Pizza Casserole through Pinterest. I've actually seen a number of them over time and finally decided to give one a go, despite my being nervous with using pepperoni (I'm not afraid, I just can't have spicy food and pepperoni can be iffy with my stomach). It turned out fantastic! My husband told me he definitely wants me to make it again. Even our four year old loved it! And since I got plenty of leftovers with it, we had supper for the next night and lunches for the next two days!

(Not my picture or recipe. Click title for original.)


Ingredients:
2 lbs. ground beef
1 large onion, chopped
1 clove garlic, minced
1 tsp. Italian seasoning
2 Tbsp. olive oil
2 (26 oz.) jars spaghetti sauce
16 oz. rotini pasta, cooked and drained
5 c. shredded mozzarella cheese
8 oz. sliced pepperoni

Directions:
Brown ground beef, onion, and garlic in oil. Drain. Stir in pasta, spaghetti sauce, and 3 cups of cheese.

Place mixture in two greased 9x13 pans. Sprinkle with remaining cheese and top with pepperoni. Cover and freeze or bake uncovered at 350 for 25-30 minutes or until heated through.


Told you it was really simple!

To see the pin, click here!

Until next time,

Amanda

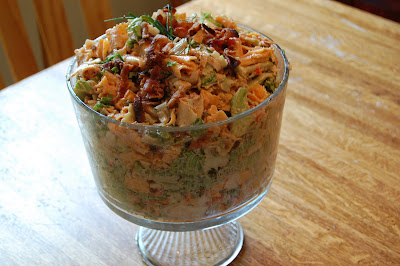
BLT Pasta Salad

Every time we all get together with my in-law's it's kind of a fight of what to bring because with so many of us, we can only have so many fruit and veggie trays or some sort of salad. I'm always looking for some sort of new salad or dessert or something for these kind of events just so I know we're not eating the same thing or I'm not the one bringing the same thing every time, or if I am that it gets an added creative twist.

When I stumbled across this recipe (thank you Pinterest!) I knew we had to try it because it's something that would be great for our big group, and I love me a BLT, so getting it in a salad form was just an added plus! So here, I bring you with a salad version of a delicious lunch item!

(Not my picture or recipe. For original click on title.)


Ingredients:
12 oz. corkscrew-shaped pasta
1/2 c. milk
12 oz. lean bacon
3 medium rip tomatoes, cut into chunks
1 Tbsp. chopped fresh thyme
1 clove garlic, minced
Kosher salt and freshly ground pepper
1/2 c. mayo
1/4 c. sour cream
4 Tbsp. chopped chives or scallion greens
5 heads Bibb lettuce, quartered, or 5 c. chopped romaine lettuce

Directions:
Cook the pasta in a large pot of salted boiling water as the label directs. Drain and toss with milk in a large bowl; set aside.

Meanwhile, cook the bacon in a large skillet over med-high heat until crisp (I always bake my bacon). Drain on paper towels. Discard all but 3 Tbsp. of pan drippings. Add the tomatoes, thyme, and garlic to the pan and toss until warmed through; season with salt and pepper. Crumble the bacon into bite-sized pieced; set aside 1/4 c. for garnish. Toss the remaining bacon and tomato mixture with the pasta.

Mix the mayo, sour cream, and 3 Tbsp. chives with the pasta until evenly combined. Season with salt and pepper. Add lettuce; toss again to coat. Garnish with the reserved bacon and the remaining 1 Tbsp. chives. Serve at room temperature.


I hope this works as well with your family as it does ours. I know I'll definitely be making this next time we're all together!

To view pin, click here!

Until next time,

Amanda


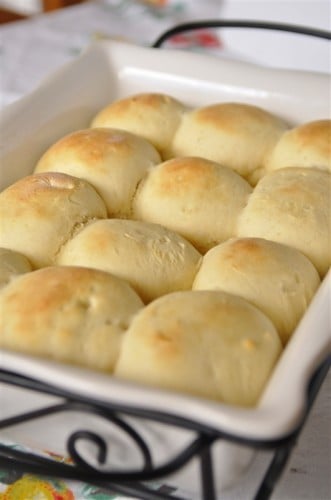
30 Minute Rolls

I love meals that are quick an easy. Especially when I'm making buns or bread to go with it. I stumbled across this recipe thanks to good ol' pinterest and have found it to be amazing! We didn't eat them all with supper, but we had rolls for the next couple of days for lunches and snacking. My son and husband loved them and have asked me to make them again and again!

These rolls are SO easy and super quick with only taking 30 minutes! That's from start to finish even! So if you're looking for a good, quick, and easy roll recipe, especially for family get together's, I've got you totally covered!

(Not my picture or recipe. For original, click on title.)


Ingredients:
1 c. plus 2 Tbsp. warm water
1/3 c. oil
2 Tbsp. yeast
1/4 c. sugar
1 1/2 tsp. salt
1 egg
3 1/2 c. bread flour (could use all-purpose though too)

Directions:
Preheat oven to 400 degrees F.

In your mixer bowl, combine the water, oil, yeast, and sugar and allow it o rest for 15 minutes. Using your dough hook, mix in the salt, egg, and flour.  Knead with hook until well incorporated and dough is soft and smooth. (About 5 minutes.)

Form dough into 12 balls and then place in a greased 9x13 pan and allow to rest for 10 minutes. Bake for 10 minutes at 400 degrees or until golden brown.


I hope you all enjoy these like we did!

To see the pin, click here!

Until next time,

Amanda

Monday, January 21, 2013

Baked Crab Rangoon

My husband and I weren't really all that hungry so I decided to make supper an appetizer night. This particular recipe I've had sitting around for awhile and I'm not entirely sure of it's origin as I printed it off so long ago. However, I'm sure I found it through Pinterest or some food blog!

Tonight I finally got around to making what ended up being an AWESOME Baked Crab Rangoon! Naturally, I HAD to share the recipe with you all after finding it to be a big success! Even my husband who isn't much of a seafood fan liked it!

(My photo, however not my original recipe)

Baked Crab Rangoon

Ingredients:
8 oz. crab meat, drained and flaked
8 oz. cream cheese, at room temperature
1/2 tsp. Worcestershire sauce
3/4 tsp. light soy sauce
1 clove garlic, finely minced
1 1/2 Tbsp. onion, minced
1 pkg. wonton wrapppers (I only used about half, but I suppose it depends on the size)
Water for sealing wontons
3-4 Tbsp. butter, melted

Directions:
Combine the crab, garlic, and onion in a medium bowl. In a small bowl, combine the cream cheese, Worcestershire sauce, and soy sauce thoroughly. Add the cream cheese mixture to the crab mixture and combine thoroughly.

Place a wonton wrapper on a flat surface so it forms a diamond shape. Wet the edges of the wonton. Place a heaping teaspoon of filling in the middle of the wonton and spread it out toward the left and right points of the diamond.

Fold over the edges of the wrapper so that it forms a triangle. Seal the edges, adding more water if needed. I folded each point of the triangle over again, as an added measure to keep he wonton sealed.

Cover the completed rangoon with a damp paper towel to prevent from drying out while preparing the rest.

Place sealed wontons on a nonstick baking sheet and brush the tops with melted butter. Bake at 425 degrees F for about 12 minutes or until golden brown.

Makes about 48 Crab Rangoon.


I hope you all enjoy this recipe as much as we did! It's perfect for the holidays, family get togethers, a dinner party, or just a simple appetizer supper like we had!

If you'd like to see the pin, click here!

Until next time,

Amanda


Oatmeal Blueberry Applesauce Muffins

I love muffins. And cupcakes. So does my son... In fact, my son pretty much thinks of cupcakes and muffins as the same thing, and really the biggest difference is the glob of icing on the top, so naturally, when he gets a muffin with his breakfast he thinks it's the best day in the world! Tonight I decided to try a new recipe for muffins that I found on, none other than, Pinterest! I love muffins, especially blueberry, s I knew this would be a likely hit and boy was I right! So, of course I had to share with you all! Here you go!

(My picture, but not my original recipe. To see original, click title)

Ingredients:
1 1/4 c. whole wheat flour
1 1/4 c. oats
1 tsp. baking powder
1/2 tsp. baking soda
1/4 tsp. salt
1/2 tsp. cinnamon
1 c. unsweetened applesauce
1/2 c. low-fat buttermilk
1/2 c. firmly packed brown sugar
2 Tbsp. canola oil
1 large egg, lightly beaten
3/4 c. blueberries (fresh or frozen)

Directions:
Preheat oven to 375 degrees F.

Line a 12-cup muffin tin with paper liners or spray with nonstick cooking spray.

In a large bowl, combine flour, oats, baking powder, baking soda, salt, and cinnamon. In a medium bowl, combine applesauce, buttermilk, sugar, oil, and egg. Make a well in dry ingredients and add applesauce mixture. Stir until just moist. Fold in blueberries and fill muffin cups 2/3 full.

Bake for 16-18 minutes. Enjoy!


It's a really simple and quick recipe AND it tastes delicious! I hope you and your family enjoy them as much as we do!

For the pin, click here!

Until next time, 

Amanda.


Sunday, January 13, 2013

Loaded Mashed Potatoes

I love mashed potatoes. It's seriously my most favorite form of potato and I'm convinced that my grandma makes the best on this planet. I don't know how she manages to make them taste so darn good, but they are to die for.

When I found this recipe on Pinterest I KNEW it was going to be love. Boy, oh, boy was I right! I coupled them with a previous recipe I posted, Honey Butter Pork Tenderloin.

(Not my picture or original recipe. To view recipe click on title)


Ingredients:
5 lbs. potatoes, peeled and cubed
3/4 c. sour cream
1/2 c. milk
3 Tbsp. butter
salt and pepper to taste
3 c. shredded cheddar cheese blend, divided
1/2 lb. sliced bacon, cooked and crumbled
3 green onions, sliced

Directions:
Place potatoes in a Dutch oven and cover with water. Bring to a boil. Reduce heat; cover and simmer for 10-15 minutes or until tender. Drain and place in a large bowl. Add the sour cream, milk, butter, salt and pepper. Beat on med-low speed until light and fluffy. Stir in 2 cups cheese, bacon and onions.

Transfer to a greased 3 qt. baking dish. Top with remaining cheese. Bake, uncovered, at 350 degrees F for 30 minutes or until heated through and cheese is melted. 


I hope you enjoy this recipe as much as my family did!

To view the pin, click here!

Until next time,

Amanda

Honey Butter Pork Tenderloin

I love pork. Especially tenderloin and chops. So when I stumbled across this recipe on Pinterest, I know I just HAD to try it! It sounded delicious, the picture looked delicious, and I just knew it'd go over well in my house.

 I coupled this recipe with a side dish for Loaded Mashed Potatoes, which I will give you the recipe in another post.

(Not my picture or my original recipe. To view original click on the title)


Ingredients:
4 Tbsp butter
2 Tbsp Honey
1 1/2 lbs. pork tenderloin, trimmed
1/2 tsp. Cajun seasoning
1/2 tsp. black pepper
3/4 c. water

Directions:
Preheat oven to 375 degrees F. In an ovenproof pot, heat butter and honey over medium heat until melted. Sprinkle pork tenderloin with Cajun seasoning and black pepper. Brown each side for 5 minutes in the honey butter. Lower heat if honey begins to burn.

Place pot in oven and roast uncovered for 15-20 minutes. Remove pot from oven and transfer the pork to a plate. Cover with foil.

Add water to the pot and stir over medium heat. Simmer for about 5 minutes, until sauce is reduced slightly. Slice pork on the diagonal and drizzle sauce over top to serve.


I just know this recipe is going to be used again and again. It came out SO delicious!

You can view the pin here!

Until next time,

Amanda


Layered Zucchini Parmesan

Here, I present to you my second post for the night!

In my last post I gave you a recipe for Pork Schnitzel. Well the night this week that I made that I was trying to figure out what could with it and decided on this recipe. Now, this Zucchini Parmesan could either be a side dish or a vegetarian dish on it's own I suppose. I chose to do it as a side so I could have more for leftovers! So here you go, ladies and gentleman!

(Not my picture or my recipe. Click the title for original)


Ingredients:
3 large zucchini, sliced into 1/3-inch coins
1 Tablespoon Extra-Virgin Olive Oil
1/2 cup parmesan cheese, grated and divided in half
1/4 cup Italian bread crumbs
salt & freshly ground pepper to taste
1 cu marinara sauce, homemade or bottled
1/2 cup mozzarella cheese, grated

Directions:
Preheat oven to 450 degrees F. Coat a large baking sheet with non-stick cooking spray.

Blot zucchini coins with paper towels to remove excess moisture. Place zucchini in a medium bowl and drizzle with olive oil, turning to coat each piece. In a separate bowl, combine half the parmesan, bread crumbs, salt, and pepper.

Dip each zucchini coin into the parmesan mixture, turning to coat and pressing the breading slightly to ensure it sticks. Place breaded zucchini coins in one even layer on prepared baking sheet. Bake for 25 minutes or until browned and crisp.

Reduce the oven temperature to 400 degrees F. Coat the bottom of a small baking dish with marinara sauce. Layer one third of the crisp zucchini coins over marinara, overlapping if necessary. Sprinkle zucchini layer with mozzarella and the remaining parmesan. Repeat the layers 3 times (or until the zucchini is gone, depending on the size of your baking dish) ending a sprinkling of cheese.

Bake for 10-15 minutes or until the cheese is melted and the sauce is bubbling. Cool for 5 minutes before serving.


There you have it folks! Another great recipe for you to try!

Check out the pin here!

Until next time,

Amanda